Showing posts with label fruit. Show all posts

Wednesday, August 25, 2010

dimply plum cake - homage to my fave

P8260197I'm going on record and stating that my ultimate favorite food blog is Smitten Kitchen. Deb is so eloquent and captivating, not to mention her food choices fall along the lines of my own (vegetarian generally, not too presumptuous). And only until I moved into my own 20 square foot kitchen via NYC, I fully understood her tribulations. I could even somewhat accredit her for my own ambition to start a food blog with dazzling photos and witty composition.


P8260178P8260184
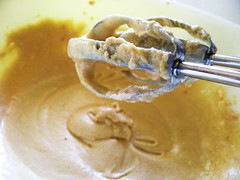
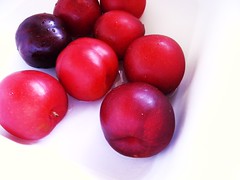
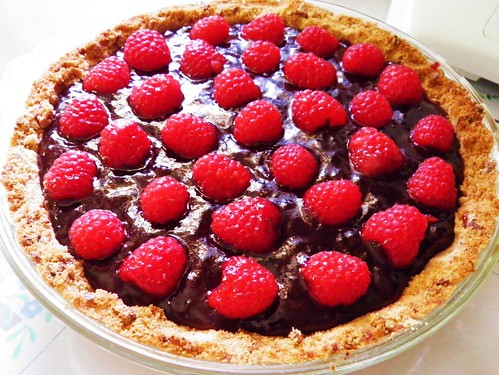
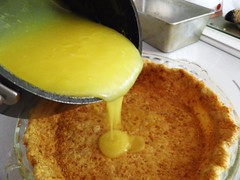
So when I find a recipe from my favorite-est blogger incorporating fresh seasonal fruit and a tangy spiced loaf, I make it! It also doesn't hurt that the name for it is "dimply plum cake." (Adorbz much?)

P8260194
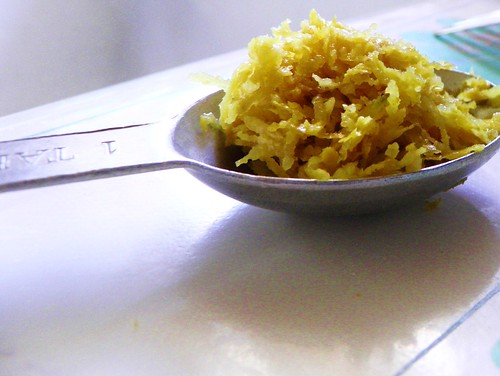
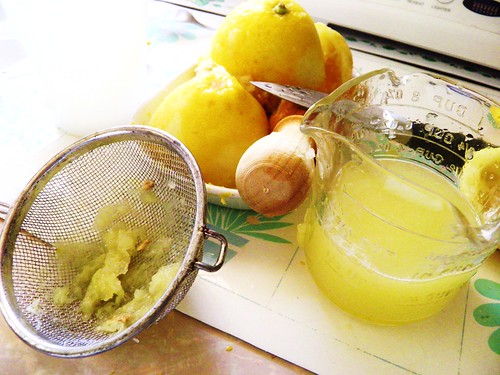
One small dilemma, I'm no fan of zested orange. In fact, I have never been much of a fan of any zested citrus. Only until recently, I have avoided this step in most recipes, just to appease my own palate. But hold on one second, it did come from Deb's site, ergo, it must be scrumptious. I think I'll give it a shot.

P8260198P8260201
P8260201P8260272
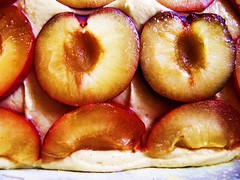
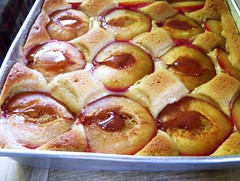
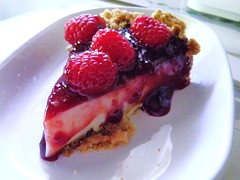
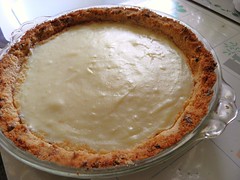
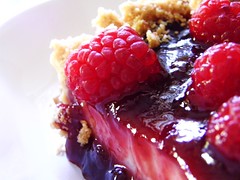
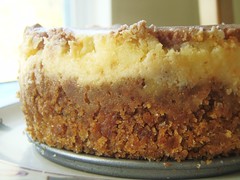
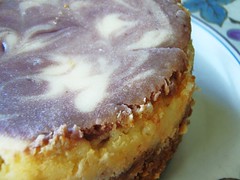
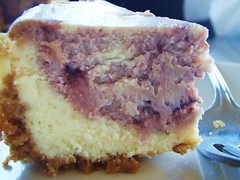
I can remember the smell of the cake as I carried it out of the oven- a strong sweetness of the fresh plums, wafting with orange tints and cinnamon backdrops.

P8260277
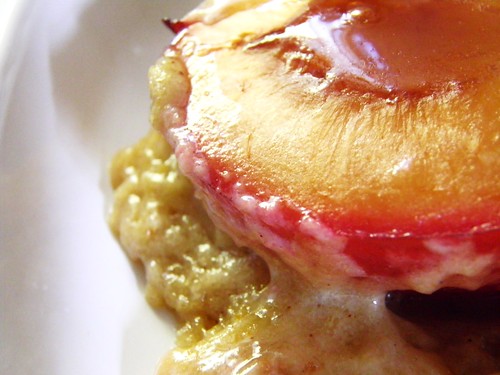
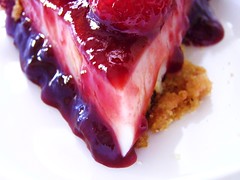
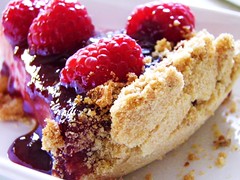
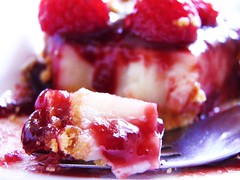
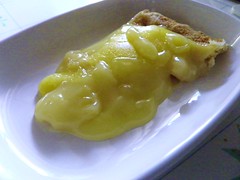
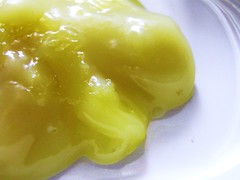
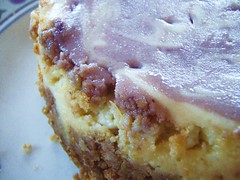
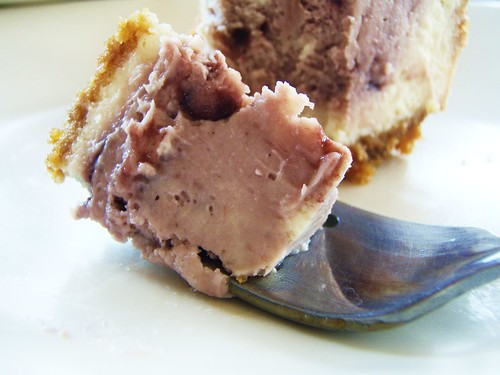
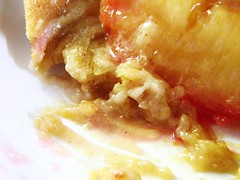
As tasty as it smelt, I was hesitant to pair the bite with scent. I think I may have done something wrong. The cake part was utterly gooey and mushy, as if the plums had purposely secreted all their juices to overpower the deliciousness of the cake. I knew I shouldn't have added that darn orange zest!

P8260275P8260280
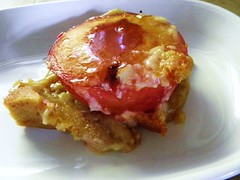
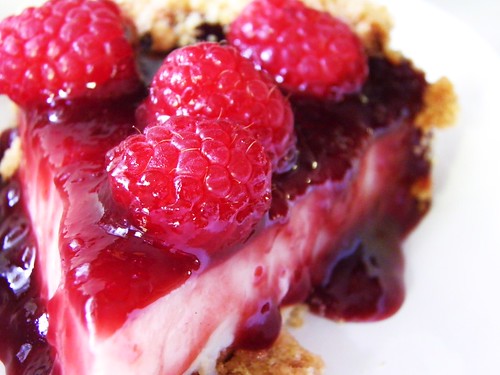
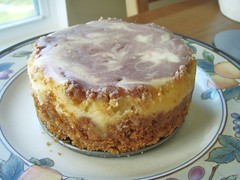
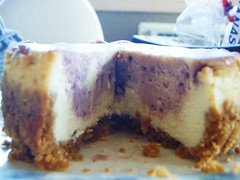
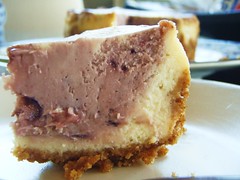
Whatever mishaps happened, I thoroughly enjoyed it. I was able to look past the mushiness of the cake and the thickness provided by the plums skins, and savor the overall dish. Hey, I was even able to get over my aversion to orange zest. Win!

---RECIPE---
Taken from Smitten Kitchen.

ingredients:
1 1/2 cups all-purpose flour
2 teaspoons baking powder
1/4 teaspoon salt
Scant 1/4 teaspoon ground cinnamon
5 tablespoons unsalted butter, at room temperature
3/4 cup (packed) light brown sugar
2 large eggs
1/3 cup flavorless oil, such as canola or safflower
Grated zest of 1 orange
1 1/2 teaspoons pure vanilla extract
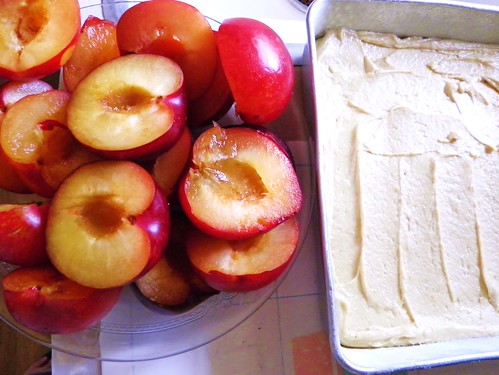
8 purple or red plums (or even Italian prune plums, when they are in season), halved and pitted

directions:
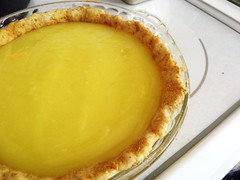
1. Center a rack in the oven and preheat the oven to 350°F. Butter an 8-inch square baking pan, dust the inside with flour, tap out the excess and put the pan on a baking sheet. (Alternately, you can use this spray to butter and flour, which is indeed my greatest baking Joy.)
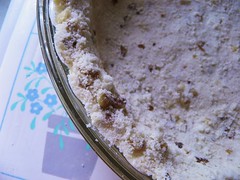
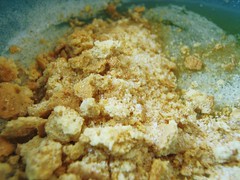
2. Whisk the flour, baking powder, salt and cinnamon together.
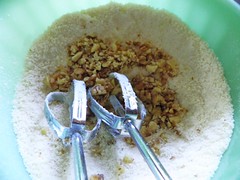
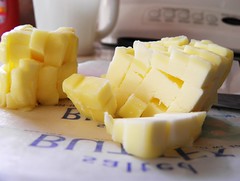
3. Working with a mixer, beat the butter at medium speed until it’s soft and creamy, about 3 minutes. Add the sugar and beat for another 3 minutes, then add the eggs, one at a time, and beat for a minute after each egg goes in. Still working on medium speed, beat in the oil, zest and vanilla; the batter will look smooth and creamy, almost satiny. Reduce the mixer speed to low and add the dry ingredients, mixing only until they are incorporated.
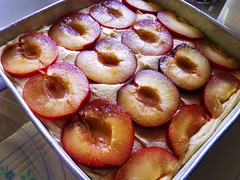
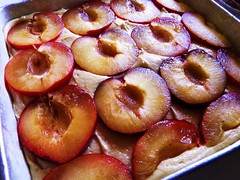
4. Run a spatula around the bowl and under the batter, just to make sure there are no dry spots, then scrape the batter into the pan and smooth the top. Arrange the plums cut side up in the batter–Dorie says she usually makes four rows of four plum halves each–jiggling the plums a tad just so they settle comfortably into the batter.
5. Bake for about 30 to 40 minutes (Dorie says 40, mine was done in 30 so check early and often), or until the top is honey brown and puffed around the plums and a thin knife inserted into the center of the cake comes out clean. Transfer the cake to a rack and cool for 15 minutes during which time the plums juices will seep back into the cake then run a knife around the sides of the pan and unmold the cake. Invert and cool right side up.

Saturday, August 21, 2010

raspberry custard pie - really? you'll actually eat my pie for me?

P8250347One of my biggest dilemmas in life is that I can't eat an entire pie by myself. Believe it or not, this little issue presents the everyday home baker with many problems. Let's say I find a great recipe for a pie. First I'd obviously have to bake it, then I'd have my typical slice to taste it. Now what the fuck am I supposed to do with the 90% of the leftover pie? I only wanted one goddamn slice. I could, of course, have one piece of pie for every meal for the next ten days- but that'd be just stupid and calorie consuming. I also have the option of giving it to people (such as my roommates), but that would completely dictate what type of pie I could make in the first place (just my luck for having picking roommates). My baking has now been forced to revolve around what to do with my leftover goodies.

P8240059P8240066
P8240078P8250168
While chillin' with some of my grandma's buddies at the local nursing home, the topic of desserts came up. I willingly offered to bake anything for them as long as it was all eaten up and out of my sight. Lucky me- I have miraculously found a group of old ladies so senile enough that they'd eat my pie for me!

P8250180P8250175
P8250187P8250185
The choice of dessert was obviously in their hands. A raspberry custard pie came up, and I was instantly convinced this would be immensely delectable. I rarely ever get to make custards (due to my picky crowd back at home) and I rarely get to use fresh fruit (the broke college student role coming into play). I was originally planning on adding blackberries as well, but unfortunately due to an empty stomach those were quickly devoured.

P8250191
Okay, quick play-by-play as to what's going on here: Crust is not a basic pie crust; it's more of a crumbly shortbread dough with chopped walnuts. Main layer is a basic vanilla custard, already baked and cooled. On top of that is a layer of warmed raspberry preserves, which was intended to congeal and firm up in the fridge. Additional raspberries were placed in the preserves mostly for aesthetics (what else is new).

P8250348P8250355
P8250362P8250349
Dreams really can come true. What you see here is one single slice of pie- that is all. The remaining 90% of my pie is somewhere in a nursing home- and I really don't care what its future holds.

P8250352
Lesson be learned: Find a group of old people willing to get their hands on freshly baked goodies. I'll be sure to start my search at all nursing homes and assistant living facilities from now on.

lemon meringue pie - goopy globs galore

P8250278Lemon curd has never really appealed to me. It's sour and goopy and it looks like shit. The only good thing about it is that I've never made it before. Pie crusts- check, Fruit pies- check, Citrus flavored baked goods- check. All that I'm missing is some citrusy-fruity-pie. Enter: Cook's Illustrated's Lemon Meringue Pie (okay, so I skipped the meringue part). Thus far, CI has yet to let me down. But even so, I don't think they'll convert me to a lemon curd lover.

P8240096P8250210
My hands have officially found their calling- rolling out pie crust dough.

P8250216P8250237
Interestingly enough, the recipe called for bits and pieces of graham cracker crumbs.

P8250249
Accurate measurements, of course.

P8250255
The citrusy stench permeated through the whole house for hours.

P8250275P8250367
Goopy glob part one.

P8250368P8250374
Goopy glob part two.

P8250379
Okay, I should have let the pie rest before cutting it (Pie Commandment #1), but it was just so intruiging. I poked the top layer and it appeared to be firm as cake, but apparently while cutting it, I soon found out otherwise. I already broke the seal, so I figured I'd just slip out a piece and hope the rest congeals back together. Well to be quite honest, the pie remained goopy even after an overnight fridge rest, but most importantly, it did not defeat my lemon-dislike.

---RECIPE---
Taken from Cook's Illustrated.

pie crust ingredients:
1 1/4 cups unbleached all-purpose flour
1/2 teaspoon table salt
1 tablespoon granulated sugar
6 tablespoons unsalted butter , chilled and cut into 1/4-inch pieces
4 tablespoons vegetable shortening , chilled
3–4 tablespoons cold water
1/2 cup graham cracker crumbs

lemon filling ingredients:
1 cup granulated sugar
1/4 cup cornstarch
1/8 teaspoon table salt
1 1/2 cups cold water
6 large egg yolks
1 tablespoon lemon zest from 1 lemon
1/2 cup lemon juice from 2 to 3 lemons
2 tablespoons unsalted butter

meringue ingredients: (omitted)
1 tablespoon cornstarch
1/3 cup water
1/4 teaspoon cream of tartar
1/2 cup granulated sugar
4 large egg whites
1/2 teaspoon vanilla extract

pie crust directions:
1. Mix flour, salt and sugar in food processor fitted with steel blade. Scatter butter pieces over flour mixture, tossing to coat butter with a little of the flour. Cut butter into flour with five 1 second pulses. Add shortening; continue cutting in until flour is pale yellow and resembles coarse cornmeal with butter bits no larger than a small pea, about four more 1-second pulses. Turn mixture into medium bowl.
2. Sprinkle 3 tablespoons cold water over mixture. Using rubber spatula, fold water into mixture; press down on dough mixture with broad side of spatula until dough sticks together. If dough will not come together, add up to 1 tablespoon more cold water. Shape dough into ball, then flatten into 4-inch-wide disk. Dust lightly with flour, wrap in plastic, and refrigerate for 30 minutes before rolling.
3. Generously sprinkle work area with 2 tablespoons graham cracker crumbs. Place dough on work area. Scatter a few more crumbs over dough (see illustration 1, below). Roll dough from center to edges, turning it into a 9-inch disk, rotating a quarter turn after each stroke and sprinkling additional crumbs
underneath and on top as necessary to coat heavily, (see illustration 2). Flip dough over and continue to roll, but not rotate, to form a 13-inch disk slightly less than 1/8-inch thick.
4. Fold dough into quaarters; place dough point in center of 9-inch Pyrex pie pan. Unfold to cover pan completely, letting excess dough drape over pan lip. To fit dough to pan, lift edge of dough with one hand and press dougn in pan bottom with other hand; repeat process around circumferences of pan to ensure dough fits properly and is not stretched. Trim all around, 1/2-inch past lip of pan. Tuck 1/2 inch of overhanging dough under so folded edge is flush with lip of pan; press to seal. Press thumb and index finger about 1/2-inch apart against outside edge of dough, then use index finger or knuckle of other hand to poke a dent on inside edge of dough through opening created by the other fingers. Repeat to flute around perimeter of pie shell.
5. Refrigerate until firm, about 30 minutes. Use fork to prick shell at 1/2-inch intervals; press a doubled 12-inch square of aluminum foil into pie shell; prick again and refrigerate at least 30 minutes.
6. Adjust oven rack to lowest position, heat oven to 400 degrees. Bake, checking occasionally for ballooning, until crust is firmly set, about 15 minutes. Reduce oven temperature to 350 degrees, remove foil, and continue to bake until crust is crisp and rich brown in color, about 10 minutes longer.


lemon filling directions:
7. Mix sugar, cornstarch, salt, and water in a large, nonreactive saucepan. Bring mixture to simmer over medium heat, whisking occasionally at beginning of the process and more frequently as mixture begins to thicken. When mixture starts to simmer and turn translucent, whisk in egg yolks, two at a time. Whisk in zest, then lemon juice, and finally butter. Bring mixture to a brisk simmer, whisking constantly. Remove from heat, place plastic wrap directly on surface of filling to keep hot and prevent skin from forming.


meringue directions:
8. Mix cornstarch with 1/3 cup water in small saucepan; bring to simmer, whisking occasionally at beginning and more frequently as mixture thickens. When mixture starts to simmer and turn translucent, remove from heat. Let cool while beating egg whites.
9. Heat oven to 325 degrees. Mix cream of tartar and sugar together. Beat egg whites and vanilla until frothy. Beat in sugar mixture, 1 tablespoon at a time; until sugar is incorporated and mixture forms soft peaks. Add cornstarch mixture, 1 tablespoon at a time; continue to beat meringue to stiff peaks. Remove plastic from filling and return to very low heat during last minute or so of beating meringue (to ensure filling is hot).
10. Pour filling into pie shell. Using a rubber spatula, immediately distribute meringue evenly around edge then center of pie to keep it from sinking into filling. Make sure meringue attaches to pie crust to prevent shrinking . Use spoon to create peaks all over meringue. Bake pie until meringue is golden brown, about 20 minutes. Transfer to wire rack and cool to room temperature. Serve.

Friday, April 9, 2010

mini blackberry cheesecake - purple and fruity, just like me

mini blackberry cheesecake - 20My weekends typically begin on Fridays. You see, I've perfectly arranged my schedule these past three years in college to avoid the dreaded Friday morning classes. The only way to celebrate (at least in my book) is to bake! What else is new? Although this is nothing out of the ordinary for me, as I typically already do bake my ass off every Friday, I wanted to do something a little different today. Perhaps I'd fiddle with some recipes and conjure up some baked goods of my own. Hold on- am I even capable of such a feat?

mini blackberry cheesecake - 01mini blackberry cheesecake - 04
There are some baking recipes that are more forgiving than others- cheesecake, for example. Regardless if you're making a New York style cheesecake, a creamy smooth cheesecake, or even a flavored one for that matter, it all comes down to the basics. I generally stick to recipes with a smaller height and with the use of flour.

mini blackberry cheesecake - 08mini blackberry cheesecake - 12
Luckily for me, I recently bought a mini cheesecake pan (4.5 inches). As seen in my mini lime cheesecake for St. Patrick's Day, I was able to one-fourth the recipe to create this little tin of creamy goodness. As for the flavoring for this cheesecake, well, let's just say I played around with it.

mini blackberry cheesecake - 17mini blackberry cheesecake - 18
I found a delicious jar of blackberry jam in my fridge (I absolutely love blackberries). I separated about a quarter of the basic cheesecake batter into a little cup and mixed it with at least a heaping tablespoon of this delicious jam. After pouring the plain cheesecake batter in my little tin, I poured the jam version on top and did a little swirling. Gorgeous, is it not?

mini blackberry cheesecake - 32mini blackberry cheesecake - 49
First off, purple is my ultimate favorite color, so this cheesecake is essentially me in a nutshell (creamy, fruity, and purple?)

mini blackberry cheesecake - 34mini blackberry cheesecake - 40
But we all know that I can't eat an entire cheesecake, even a miniature one at that, all by myself. (Well, technically I could, but that probably wouldn't be suitable for my diet.) So the true test came when I had my picky-eater sample this concoction of mine.

mini blackberry cheesecake - 44
The verdict? Creamy, smooth, and cheesecakey. Happily he did enjoy it (and ate most of it, thank goodness). But as for me, I was personally disappointed with the lack of flavor from the jam. Perhaps I didn't use enough jam (although the bright purple color of the cheesecake says otherwise). Anyways, my purple-colored plain cheesecake did entertain me for the day (oh, and did I mention I made another mini cheesecake that day too? Hehe).

---RECIPE---
Adapted from All Recipes.
I one-fourthed the recipe to fit my 4.5 inch springform pan.

crust ingredients:
1 cup graham cracker crumbs
1/4 cup finely chopped walnuts (omitted)
3 tablespoons brown sugar (omitted)
1 tablespoon ground cinnamon (omitted)
1/2 teaspoon ground nutmeg (omitted)
5 tablespoons butter, melted

cheesecake ingredients:
3 (8-ounce) packages cream cheese
1 cup white sugar
1 cup sour cream
1 cup heavy cream
3 tablespoons all-purpose flour
1 tablespoon vanilla extract
3 eggs
1 heaping teaspoon or so of jam/preserves of your choice

directions:
1. Preheat oven to 350 degrees F. In a medium bowl, combine graham cracker crumbs, chopped walnuts, brown sugar, cinnamon, nutmeg and melted butter. Mix well and press into the bottom of a 9 inch springform pan (4.5 inch in my case). Bake in preheated oven for 10 minutes. Remove from oven and allow to cool.
2. In a large bowl, beat cream cheese and sugar together until smooth. Beat in sour cream and heavy cream. Blend in the flour and vanilla. With mixer on low speed, add eggs one at a time. Pour batter over crust.
3. If adding jam/preserves, reserve a fourth of the batter mixture into a small bowl and mix well with jam. Pour that on top of plain batter and swirl with a toothpick.
4. Bake in the preheated oven for 60 to 70 minutes, or until center is almost set (filling will be soft). Refrigerate at least 6 hours or overnight before removing from pan. ()If using a 4.5 inch baking pan, I got these directions from Hub Pages: Bake at 300 degrees for 40-45 minutes or until center of cheesecake is almost set. I let them sit in the oven after I turned it off for another 10-15 minutes.)