Showing posts with label cooks illustrated. Show all posts

Saturday, August 21, 2010

lemon meringue pie - goopy globs galore

P8250278Lemon curd has never really appealed to me. It's sour and goopy and it looks like shit. The only good thing about it is that I've never made it before. Pie crusts- check, Fruit pies- check, Citrus flavored baked goods- check. All that I'm missing is some citrusy-fruity-pie. Enter: Cook's Illustrated's Lemon Meringue Pie (okay, so I skipped the meringue part). Thus far, CI has yet to let me down. But even so, I don't think they'll convert me to a lemon curd lover.

P8240096P8250210
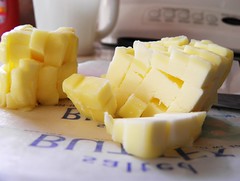
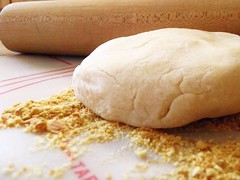
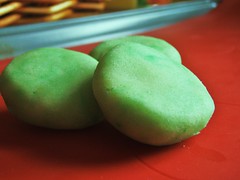
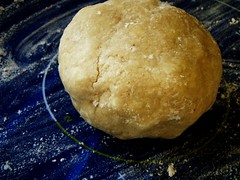
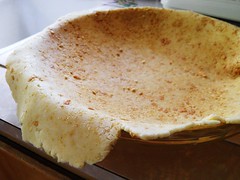
My hands have officially found their calling- rolling out pie crust dough.

P8250216P8250237
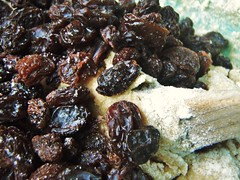
Interestingly enough, the recipe called for bits and pieces of graham cracker crumbs.

P8250249
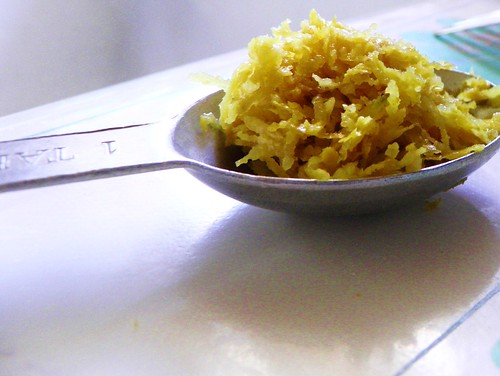
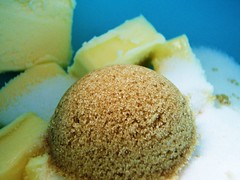
Accurate measurements, of course.

P8250255
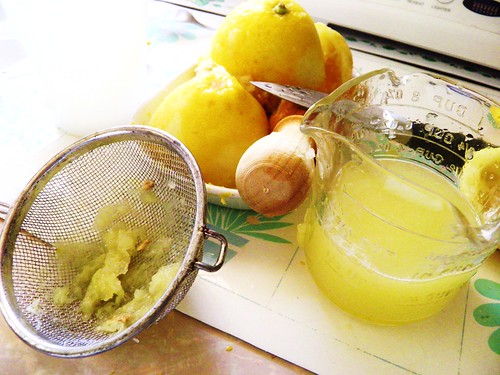
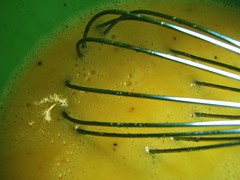
The citrusy stench permeated through the whole house for hours.

P8250275P8250367
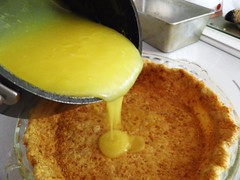
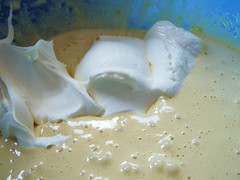
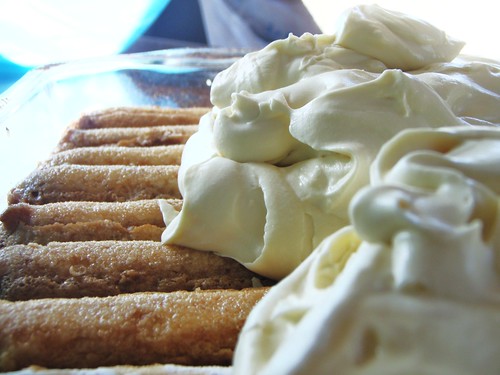
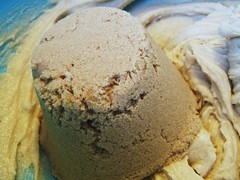
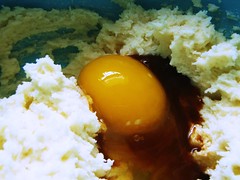
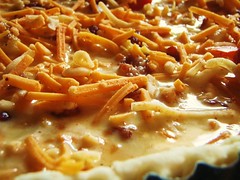
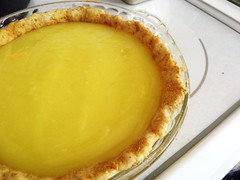
Goopy glob part one.

P8250368P8250374
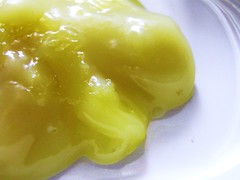
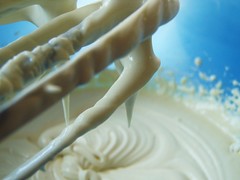
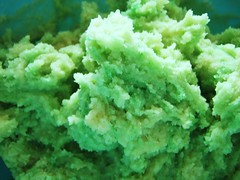
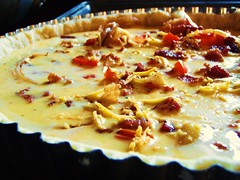
Goopy glob part two.

P8250379
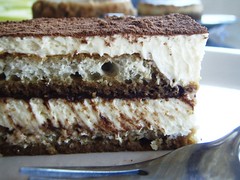
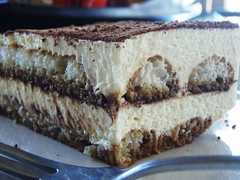
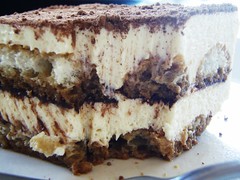
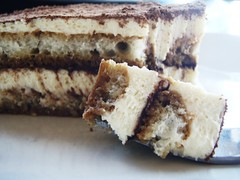
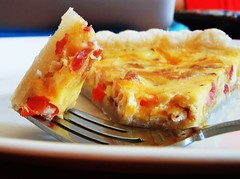
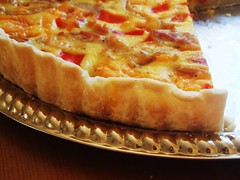
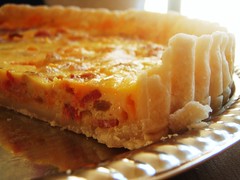
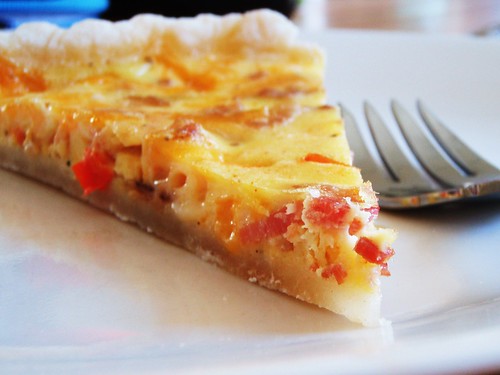
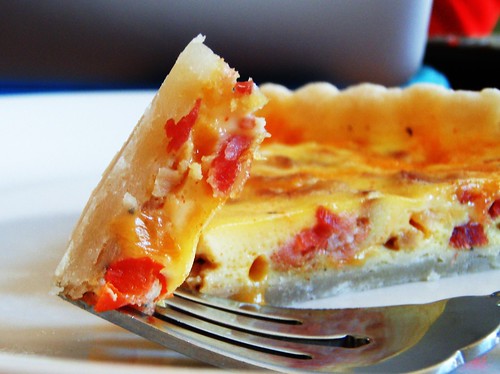
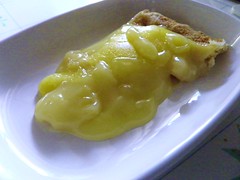
Okay, I should have let the pie rest before cutting it (Pie Commandment #1), but it was just so intruiging. I poked the top layer and it appeared to be firm as cake, but apparently while cutting it, I soon found out otherwise. I already broke the seal, so I figured I'd just slip out a piece and hope the rest congeals back together. Well to be quite honest, the pie remained goopy even after an overnight fridge rest, but most importantly, it did not defeat my lemon-dislike.

---RECIPE---
Taken from Cook's Illustrated.

pie crust ingredients:
1 1/4 cups unbleached all-purpose flour
1/2 teaspoon table salt
1 tablespoon granulated sugar
6 tablespoons unsalted butter , chilled and cut into 1/4-inch pieces
4 tablespoons vegetable shortening , chilled
3–4 tablespoons cold water
1/2 cup graham cracker crumbs

lemon filling ingredients:
1 cup granulated sugar
1/4 cup cornstarch
1/8 teaspoon table salt
1 1/2 cups cold water
6 large egg yolks
1 tablespoon lemon zest from 1 lemon
1/2 cup lemon juice from 2 to 3 lemons
2 tablespoons unsalted butter

meringue ingredients: (omitted)
1 tablespoon cornstarch
1/3 cup water
1/4 teaspoon cream of tartar
1/2 cup granulated sugar
4 large egg whites
1/2 teaspoon vanilla extract

pie crust directions:
1. Mix flour, salt and sugar in food processor fitted with steel blade. Scatter butter pieces over flour mixture, tossing to coat butter with a little of the flour. Cut butter into flour with five 1 second pulses. Add shortening; continue cutting in until flour is pale yellow and resembles coarse cornmeal with butter bits no larger than a small pea, about four more 1-second pulses. Turn mixture into medium bowl.
2. Sprinkle 3 tablespoons cold water over mixture. Using rubber spatula, fold water into mixture; press down on dough mixture with broad side of spatula until dough sticks together. If dough will not come together, add up to 1 tablespoon more cold water. Shape dough into ball, then flatten into 4-inch-wide disk. Dust lightly with flour, wrap in plastic, and refrigerate for 30 minutes before rolling.
3. Generously sprinkle work area with 2 tablespoons graham cracker crumbs. Place dough on work area. Scatter a few more crumbs over dough (see illustration 1, below). Roll dough from center to edges, turning it into a 9-inch disk, rotating a quarter turn after each stroke and sprinkling additional crumbs
underneath and on top as necessary to coat heavily, (see illustration 2). Flip dough over and continue to roll, but not rotate, to form a 13-inch disk slightly less than 1/8-inch thick.
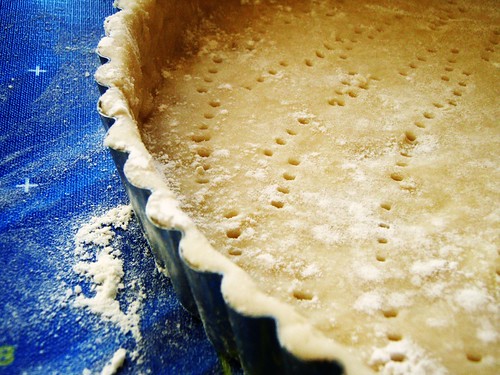
4. Fold dough into quaarters; place dough point in center of 9-inch Pyrex pie pan. Unfold to cover pan completely, letting excess dough drape over pan lip. To fit dough to pan, lift edge of dough with one hand and press dougn in pan bottom with other hand; repeat process around circumferences of pan to ensure dough fits properly and is not stretched. Trim all around, 1/2-inch past lip of pan. Tuck 1/2 inch of overhanging dough under so folded edge is flush with lip of pan; press to seal. Press thumb and index finger about 1/2-inch apart against outside edge of dough, then use index finger or knuckle of other hand to poke a dent on inside edge of dough through opening created by the other fingers. Repeat to flute around perimeter of pie shell.
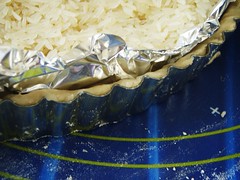
5. Refrigerate until firm, about 30 minutes. Use fork to prick shell at 1/2-inch intervals; press a doubled 12-inch square of aluminum foil into pie shell; prick again and refrigerate at least 30 minutes.
6. Adjust oven rack to lowest position, heat oven to 400 degrees. Bake, checking occasionally for ballooning, until crust is firmly set, about 15 minutes. Reduce oven temperature to 350 degrees, remove foil, and continue to bake until crust is crisp and rich brown in color, about 10 minutes longer.


lemon filling directions:
7. Mix sugar, cornstarch, salt, and water in a large, nonreactive saucepan. Bring mixture to simmer over medium heat, whisking occasionally at beginning of the process and more frequently as mixture begins to thicken. When mixture starts to simmer and turn translucent, whisk in egg yolks, two at a time. Whisk in zest, then lemon juice, and finally butter. Bring mixture to a brisk simmer, whisking constantly. Remove from heat, place plastic wrap directly on surface of filling to keep hot and prevent skin from forming.


meringue directions:
8. Mix cornstarch with 1/3 cup water in small saucepan; bring to simmer, whisking occasionally at beginning and more frequently as mixture thickens. When mixture starts to simmer and turn translucent, remove from heat. Let cool while beating egg whites.
9. Heat oven to 325 degrees. Mix cream of tartar and sugar together. Beat egg whites and vanilla until frothy. Beat in sugar mixture, 1 tablespoon at a time; until sugar is incorporated and mixture forms soft peaks. Add cornstarch mixture, 1 tablespoon at a time; continue to beat meringue to stiff peaks. Remove plastic from filling and return to very low heat during last minute or so of beating meringue (to ensure filling is hot).
10. Pour filling into pie shell. Using a rubber spatula, immediately distribute meringue evenly around edge then center of pie to keep it from sinking into filling. Make sure meringue attaches to pie crust to prevent shrinking . Use spoon to create peaks all over meringue. Bake pie until meringue is golden brown, about 20 minutes. Transfer to wire rack and cool to room temperature. Serve.

Tuesday, April 6, 2010

tiramisu - granting the final of the trifecta

cooks illustrated tiramisu - 15The day before I left for California, my boyfriend and I contemplated what to bake for the day (seeing as how we both needed our daily fix of sweets). My boyfriend, as predictable as he is, generally craves the same things. Besides the good ol' chocolate chip cookies and chewy chunky blondies, he's constantly on the request for red velvet cake, napoleons, or tiramisu. While I've granted him both the red velvet cake and the napoleon, I still have yet to make a tiramisu for him. What a poor, deprived baby.

cooks illustrated tiramisu - 01cooks illustrated tiramisu - 06
Truth is, I've made tiramisu before (while at my parents' house over last winter break). It came out decadent and delicious, and quite possibly equal to the tiramisus I've tasted in Italy.

cooks illustrated tiramisu - 07cooks illustrated tiramisu - 09
The reason why I've never made tiramisu at home is simple- money. Go and call me cheap, but when a recipe calls for 1.5 pounds of mascapone cheese (up to $4 for a single 8 oz. cup), more than 50 lady fingers, and a ton of heavy whipping cream, tell me you wouldn't do the same and put this pricey cost upon your parents.

cooks illustrated tiramisu - 12
Well I guess my boyfriend was craving tiramisu to the ultimate extreme that he was willing to forgo these pricey costs just to have a slice. But once I mentioned to him that there was a minimum 24 hour wait before taste time (which from my last experience I'm capable of attesting to this fact), he slowly surrendered.

cooks illustrated tiramisu - 19cooks illustrated tiramisu - 21
In any case, we ended up baking the cookies and the blondies, for which I would bring half to my family in California. My conniving boyfriend on the other hand waited patiently for my return so we could finish up on his request. We spent the entire day preparing this boozy Italian cake, and then waited the allotted 24 hour span for it meld. (And yes, I was a tiramisu nazi making sure he didn't sneak a slice when I wasn't looking.)

cooks illustrated tiramisu - 27cooks illustrated tiramisu - 26
When the appropriate time arrived, I cut him a big ol' slice of tiramisu. His eyes watched in amazement as these layers of cake and cream that he really did help create, magically transformed into this famous Italian "pick me up".

cooks illustrated tiramisu - 24
The taste was just as delicious as the first time I made it, (maybe even more, because I had a delicious boy helping me create it).

---RECIPE---
Taken from Cook's Illustrated.

Recipe found here.

Friday, March 19, 2010

oatmeal raisin cookies - afraid of the oven, my ass

cook's illustrated oatmeal raisin cookie - 17I used to go to California every summer and bask in the famous Orange County sun while playing (and by playing, I mean fighting with) my three younger girl cousins. Those were the days- endless weeks pretending to be frolicking among the wealthy, while really being tormented by these little dweebs because "I was the cooler cousin". Needless to say, things have greatly changed; years have passed, and egos have been burst (mine). Although I haven't spent a summer there for almost two years, I figured I'd fly down on my Spring Break to surprise the fam' of my new life changes!

cook's illustrated oatmeal raisin cookie - 04cook's illustrated oatmeal raisin cookie - 10
The last they saw of me, I was the typical angst teenager who'd rather talk on my cell with boys than play dress up with my little cousins. To top it off, for an entire 18 years of my life I have been sheltered from using all hot objects including the oven (thanks, overbearing parents!). So the girl who used to be "afraid of the oven", is now the girl "who loves to bake".

cook's illustrated oatmeal raisin cookie - 21cook's illustrated oatmeal raisin cookie - 23
Now, my smart family would obviously never believe such a tall tale without valid evidence. Proof of choice: two types of cookies (some leftover The Chewy / NY Times) and my famous oatmeal raisin cookies. I always feel that one choice of cookie is boring, so I tried to switch it up a bitch with the oats.

cook's illustrated oatmeal raisin cookie - 25
Now that I think about it, I probably subconsciously chose the oatmeal raisin cookie through a long lost memory. I can see the memory now- I'm about 10 or 11 or so, just going through my "fat" phase. I'm at my grandparents' (the ones who live in California) house. I wander downstairs to the kitchen in the middle of the night for a "little" snack. I find a pack of Little Debbie's and begin to devour these chewy circular objects. Oatmeal raisin, I see. Well, needless to say, I enjoyed them back in the day; and apparently (or I hoped so) my grandparents did as well.

cook's illustrated oatmeal raisin cookie - 39cook's illustrated oatmeal raisin cookie - 31
Typical to true form, I stick with my pals at Cook's Illustrated. They haven't let me down thus far. I prepared the dough, and then later baked them, at my boyfriend's house. I figured I'd kill two birds with one stone- bonding time during gift baking.

cook's illustrated oatmeal raisin cookie - 29
The cookies came out great- as expected. My family, while in disbelief of the news, soon believed me after eating my cookies. See- people really do change! And also- I really can bake! Hehe.

---RECIPE---

Recipe found here.

Wednesday, March 17, 2010

green clover sugar cookies - how to convince a picky eater

green shamrock sugar cookies - 81Mid-baking my green lime cheesecake, the fear of failure came over me. What if my cheesecake came out like crap? What if I really didn't like lime flavored things? Damn- I needed a for-sure thing that I knew my boyfriend and I would enjoy- I mean, I couldn't ruin Saint Patrick's Day for us! (Joke, because neither of us are Irish, nor do we care about the holiday itself). Well we all know my boyfriend absolutely loves chocolate chip cookies, but those couldn't be tinted green without looking like crap (literally). I went through other cookie recipes, specifically looking for light colored ones. All arrows pointed to sugar cookies- supposedly one of my boyfriend's "least favorite cookie".

green shamrock sugar cookies - 03green shamrock sugar cookies - 09
Ehh, who the hell cares! I've changed his mind so many other times (making him change his favorite chocolate chip cookie recipe, watching him enjoy underbaked cookies, tricking him into liking eggnog cookies, and the list goes on). I'm sure with enough convincing, he'll learn to love these sugar cookies as much as I do. And remember now, I've been on the quest to find the perfect sugar cookie for a while... and I think I finally found it.

green shamrock sugar cookies - 14green shamrock sugar cookies - 15
Dumb action for the day: Adding the food coloring to the dry batter. Duhh, I should have rethought that one. It was pretty hard to thoroughly mix the color evenly (and we know how terrified I am of overmixing batter).

green shamrock sugar cookies - 23green shamrock sugar cookies - 30
Okay, so the dough was slightly speckled with different shades of green, but whatever. I rolled the dough into three evenly sized balls and slightly squished them on top of another.

green shamrock sugar cookies - 45
During the baking process, the there little balls overlapped and formed a bond, creating these mini three-leaf clovers!

green shamrock sugar cookies - 59green shamrock sugar cookies - 65
But, we know I could do better than that. First of all, clovers are supposed to have four leaves (I guess I had a brain fart earlier), and second of all, the overlapping effect wasn't working for me.

green shamrock sugar cookies - 62green shamrock sugar cookies - 79
I also made them smaller- making them even more cuter (if that was even possible).

green shamrock sugar cookies - 85green shamrock sugar cookies - 84
So what did my picky-eater think of these sugar cookies? I know him all too well- he obviously enjoyed them because the entire plate was gone before Saint Patrick's Day was even over. The funny thing was he didn't even realize he was devouring sugar cookies. Only after all the clovers were missing did I ask him, "So you do like sugar cookies?", to which he replied, "I guess so". End of story.

---RECIPE---
Taken from Cook's Illustrated.

Recipe found here.

Sunday, March 7, 2010

mexican-inspired quiche - we ended up eating scrambled eggs instead

mexican cheese and bacon quiche tart - 44While waiting for our assortment of scones to bake and cool, my cousin's stomach began to rumble. What I learned after spending every waking moment with her was that she apparently has an out-of-this-world feeding schedule. And by feeding schedule, I mean having to feed her like a puppy every hour on the dot. I looked in my fridge and found a ton of eggs and some leftover bacon. We could take the easy way out and simply make fried bacon and scrambled eggs... Or we could go all out and make a quiche! Needless to say, we opted for the quiche. We even made homemade pie crust- how do you like them apples?

mexican cheese and bacon quiche tart - 05mexican cheese and bacon quiche tart - 07
Back to the food processor, and back to the rolling board (P.S., my grandma sent me this nifty Tupperware rolling board thing. Isn't she the sweetest little thing?).

mexican cheese and bacon quiche tart - 08
The crust rolled out pretty nicely (even due to the fact that my cousin attempted to ruin the dough by cutting the circumference without measuring it in the pan first). Yeah, I'm a nazi at this shit.

mexican cheese and bacon quiche tart - 13mexican cheese and bacon quiche tart - 15
I placed my makeshift baking beans (uncooked rice) over the pie crust so it wouldn't puff up, while my cousin beat the eggs.

mexican cheese and bacon quiche tart - 01mexican cheese and bacon quiche tart - 04
While the crust baked in the oven, we prepared the filling. Apparently all I had in my fridge were onions and bell peppers, so I guess that had to do.

mexican cheese and bacon quiche tart - 16mexican cheese and bacon quiche tart - 23
After the crust finished baking (we eyeballed the timing because my cousin doesn't like to be precise), we filled the cute little tart up to the brim. What should be especially noted was that we used no recipe for this entire dish (not counting the pie crust, because that needed to be exact). We guessed how many eggs to beat and surprisingly 6 was just the right amount. We also guessed the amount of bacon, onion, and bell pepper to perfectly spread throughout every bite. But let's not forget the cheese....

mexican cheese and bacon quiche tart - 30mexican cheese and bacon quiche tart - 31
I had the final say on the amount of cheese we added- which was obviously a very good amount. Speaking of which, the only type of cheese I had in my fridge was the "Mexican Blend". It was on sale and I had no idea what it tasted like, but I figured it would go with our newly-Mexican-inspired quiche.

mexican cheese and bacon quiche tart - 41
To be quite honest, the quiche came out deliciously. We winged the entire process, even down to baking time, and I was surprised that it came out flawlessly. The only tiff I had was that the crust dough wasn't baked thoroughly and was sort of soggy. If only we baked the crust longer, the quiche would have been impeccable. Also, by having both bell peppers and the Mexican cheese, it was like a little Mexican-fiesta in your mouth.

mexican cheese and bacon quiche tart - 45
The best part of this whole ordeal was that the quiche was taking so long to bake, the scones were too soggy, and my cousin began having fainting-spells because of her lack of food. Luckily my boyfriend was over and saved the day with his cream-cheese-eggs and bacon breakfast (my favorite). So yes, we did actually end up eating eggs and bacon for breakfast, which was what we tried to avoid in the first place. I ain't complaining though; we had a tasty breakfast and a delicious lunch.

---PIE CRUST RECIPE---
Taken from Cook's Illustrated.

ingredients:
1 1/4 cups unbleached all-purpose flour , plus extra for dusting dough
1/2 teaspoon table salt
1 tablespoon granulated sugar
4 tablespoons unsalted butter , chilled, cut into 1/4-inch pieces
3 tablespoons vegetable shortening , chilled (we just used more butter)
3–4 tablespoons ice water (we don't have an ice machine, so the water was just moderately cold)

directions:
1. Mix flour, salt, and sugar in food processor fitted with steel blade. Scatter butter pieces over flour mixture, tossing to coat butter with a little of the flour. Cut butter into flour with five 1-second pulses. Add shortening and continue cutting in until flour is pale yellow and resembles coarse cornmeal, with butter bits no larger than small peas, about four more 1-second pulses. Turn mixture into medium bowl.
2. Sprinkle 3 tablespoons ice water over mixture. With blade of rubber spatula, use folding motion to mix. Press down on dough with broad side of spatula until dough sticks together, adding up to 1 tablespoon more ice water if it will not come together. Shape into ball with hands, then flatten into 4-inch-wide disk. Dust lightly with flour, wrap in plastic, and refrigerate at least 30 minutes before rolling.
3. See, the recipe doesn't state as to how long/what temperature you should bake the crust. Which is why we had to resort to eyeballing it, hence the sogginess.)

---QUICHE RECIPE---
Made up by my cousin and myself.

1. Cook half a pack of bacon, and use the fatty leftovers to sautee half an onion and half a bell pepper.
2. Beat 6 eggs with desired seasonings (we probably only used salt, pepper, and perhaps Italian seasoning- which would be the only thing I own).
3. Pour everything, including eggs, bacon, and veggies into baked (and by baked, I mean baked) pie crust. Sprinkle with cheese (I'd go with the Mexican cheese- yum) and place in preheated 350 degree oven.
4. Bake until firm-ish!