 Knowing that my boyfriend's sister would be coming home for Thanksgiving, I wanted to bake her something special. I asked her what her favorite dessert was- and she chose a fruit tart. I was a little confused, because I knew she was lactose intolerant- but she assured me that everything would be fine (lol- let's not talk about that part). Anyways, I was a little scared yet a little excited about making my first custard tart. How does one even make a custard? That is when I looked to my handy-dandy Joy of Baking website. She never lets me down.
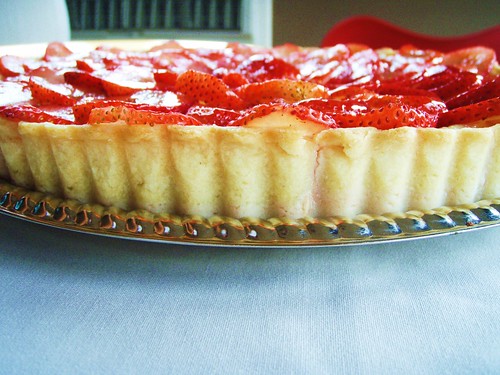
His sister and I prepared the dough the same day we made the cheesecake. The dough appeared relatively easy to put together, although rolling it out and placing it in the tart pan was another story. Notice the crack? It was hard trying to arrange the dough correctly in the tart pan, and in the process cracks appeared. Not happy!
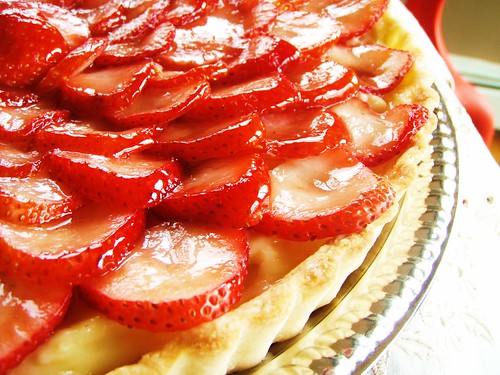
So after blind baking the crust, I moved onto the custard. My first time ever making custard- and I was extremely frightened. I don't know how to temper, I don't know how to bring everything to the same temperature, I don't know anything like that. After I made the custard, I set it in the fridge until I was ready to use it- BAD mistake. Although the recipe says that you could place the custard in the fridge for up to 3 days, my custard didn't want to cooperate and decided to completely firm up.

Once the crust was ready, I attempted to "pour" the custard in. Unfortunately, it was too hard to pour! I tried reheating it, but I just ended up crumpling it up and placing it into the crust. Even though it worked, the custard part didn't even reach halfway up the sides- it looked way too small. I frantically decided to make another batch of custard- to not only fill the tart, but cover the gross glops of custard chunks. Luckily you could barely tell when you cut a slice.
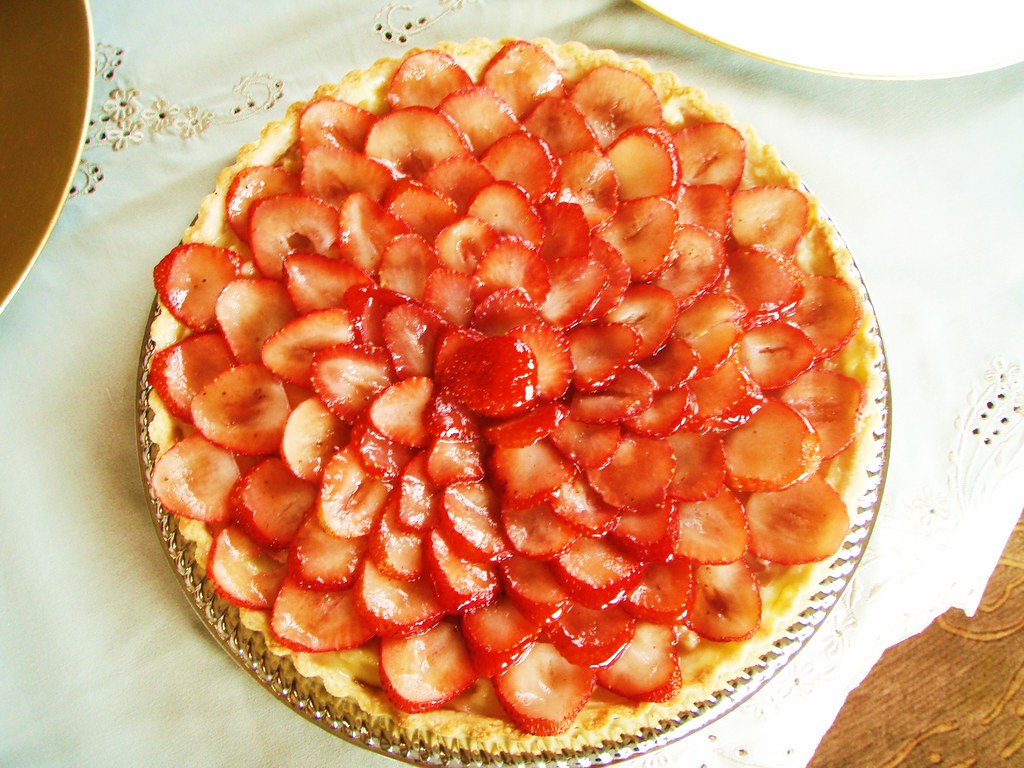
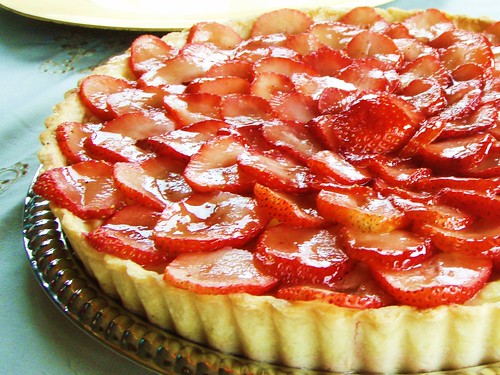
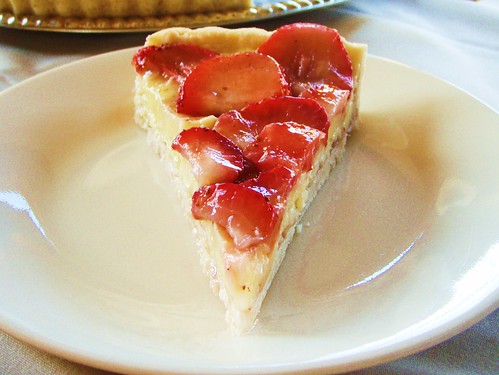
And then my favorite part- cutting all the strawberries (NOT). I cut an entire container of strawberries in slices and ordered them by size. Once in order, I could place them in concentric rings around the tart so that as you reach the center, the strawberry pieces got smaller. I'm such a perfectionist when it comes to aesthetics.
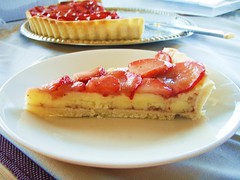
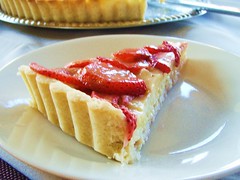
Overall, I think I did a good job for my first try making a fruit tart. I definitely will do better next time though.
P.S.- My lactose-intolerant friend ended up eating a slice of tart as well as a slice of cheesecake; and as predicted, ended up spending some quality time in the bathroom. lol.
---RECIPE---
Taken from Joy of Baking
sweet pastry crust:
1+1/2 cups all purpose flour
1/8 teaspoon salt
1/2 cup unsalted butter
1/4 cup granulated white sugar
1 large egg, lightly beaten
1. Whisk together the flour and salt. Set aside. Place the butter in your mixer and beat until softened. Add sugar and beat until light and fluffy. Gradually add the beaten egg, beating just until incorporated. Don't over mix or the butter will separate and lighten in color. Add flour mixture all at once and mix just until it forms a ball. Don't overwork or pastry will be hard when baked.
2. Flatten dough into disk, cover with plastic wrap, and refrigerate for 20 minutes or until firm.
3. Have ready an 8-9 inch tart pan with removable bottom. On a lightly floured surface, roll out the pastry into an 11-12 inch circle that is about 1/8 inch thick. To prevent the pastry from sticking to the counter and to ensure uniform thickness, keep lifting up and turning the pastry a quarter turn as you roll (always roll from the center of the pastry outwards to get uniform thickness). The pastry should be about an inch larger than pan.
4. When the pastry is rolled to the desired size, lightly roll pastry around your rolling pin, dusting off any excess flour as you roll. Unroll onto top of tart pan. Gently lay in pan and with a small floured piece of pastry, lightly press pastry into bottom and up sides of pan. Roll your rolling pin over top of pan to get rid of excess pastry. Prick bottom of dough (this will prevent the dough from puffing up as it bakes). Cover and refrigerate for 20 minutes to chill the butter and to rest the gluten.
5. Preheat oven to 400 degrees and place rack in center of oven. Line unbaked pastry shell with parchment paper or aluminum foil. Fill tart pan with pie weights, rice or beans, making sure the weights are to the top of the pan and evenly distributed over the entire surface. Bake crust for 20 to 25 minutes until crust is dry and lightly golden brown. Remove weights and cool crust on wire rack before filling.
6. When ready to fill, spread a thin layer of glaze over the bottom and sides of tart to prevent the crust from getting soggy. Let the glaze dry between 20-30 minutes.
pastry cream: (I doubled this entire part)
1+1/4 cups milk
1/2 vanilla bean, split lengthwise (omitted)
3 large egg yolks
1/4 cup granulated white sugar
1/8 cup all-purpose flour
2 tablespoons cornstarch
1. In a medium-sized stainless steel bowl, mix the sugar and egg yolks together with a wooden spoon. Sift the flour and cornstarch together and then add to the egg mixture, mixing until you get a smooth paste. Set aside.
2. Meanwhile, in a saucepan combine the milk and split vanilla bean on medium heat until boiling. Remove from heat and add slowly to egg mixture, whisking constantly to prevent curdling. Remove vanilla bean, scrape out seeds, and add the seeds to the egg mixture.
3. Place the egg mixture back into a medium saucepan and cook over medium heat until boiling, whisking constantly. When it boils, whisk mixture constantly for another 30 - 60 seconds until it becomes very thick and it is hard to stir.
4. Remove from heat. Pour into a clean bowl and immediately cover the surface with plastic wrap to prevent a crust from forming. Cool. If not using right away refrigerate until needed, up to 3 days. Beat before using to get rid of any lumps that may have formed.
glaze:
1/2 cup apricot jam or preserves (I used strawberry)
1. Heat the apricot jam or preserves and a few tablespoons of water in a small saucepan over medium heat until liquid (melted).
2. Remove from heat and strain the jam through a fine strainer to remove any fruit lumps. Let cool until it is only slightly warm.
3. When ready to glaze, gently brush a light coat on the fruit.
topping:
2 - 3 cups mixed fruit, such as raspberries, blackberries, strawberries, kiwifruit, bananas, plums, pineapple, melon, etc. (obviously I used strawberry)
No comments:
Post a Comment